Homemade Cheesy Garlic Breadsticks: An Incredible Ultimate Recipe
Homemade Cheesy Garlic Breadsticks are a delightful treat that every family should enjoy! These scrumptious breadsticks pack an amazing flavor punch, combining the irresistible taste of garlic with the comforting goodness of melted cheese. Whether you serve them as an appetizer or alongside your favorite pasta dish, they are sure to becoming a household favorite.
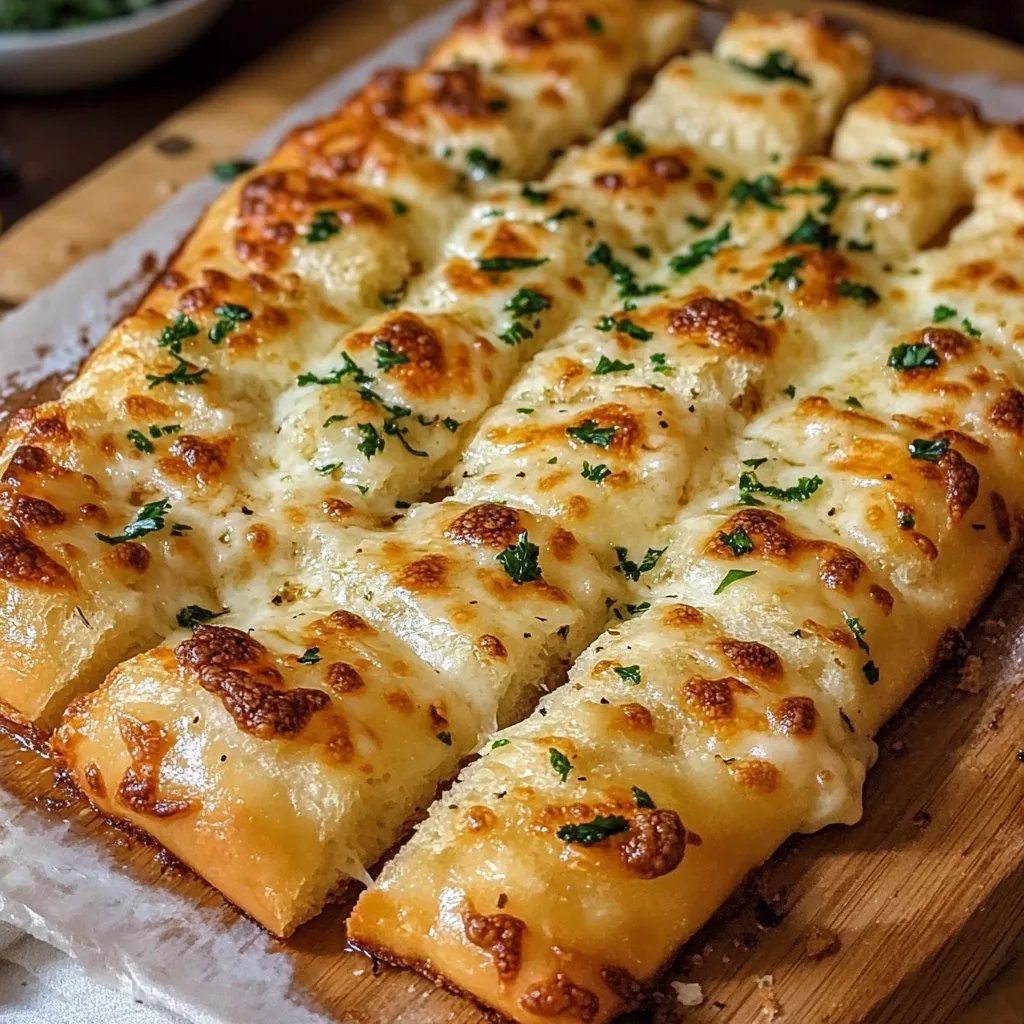
There’s something incredibly satisfying about biting into a warm, cheesy breadstick that exudes garlic aroma. Imagine pulling your breadsticks straight from the oven, that golden, cheesy top glistening as butter seeps into the fluffy dough below. If you’ve ever had store-bought breadsticks, you know they don’t hold a candle to the homemade version. This recipe will arm you with the skills necessary to create these incredible delights in your own kitchen.
In this guide, you will discover the reasons why you’ll love this recipe, what you need to get started, and detailed instructions that make the process simple and enjoyable. Get ready to transform your kitchen into a pizzeria with these homemade cheesy garlic breadsticks that are not only easy to prepare but also great for any gathering.
Why You’ll Love This Recipe
Homemade Cheesy Garlic Breadsticks are a fantastic blend of simplicity and deliciousness. Here are a few reasons this recipe will become a staple in your home:
1. Easy to Make – With minimal ingredients and straightforward instructions, even novice cooks can create great results.
2. Rich Flavor – The combination of buttery garlic and melted cheese creates an amazing flavor profile that is hard to resist.
3. Customizable – You can add your favorite herbs or even pepperoni for extra flavor, making it versatile for different tastes.
4. Perfect for Sharing – These breadsticks are an excellent option for gatherings, movie nights, or simply enjoying with family.
5. Quick Preparation – You can whip these up in under an hour, making them great for last-minute cravings or unexpected guests.
6. Kid-Approved – The cheesy, garlicky goodness is sure to appeal to kids and adults alike, making it a hit for family meals.
With all these amazing qualities, it’s no wonder homemade cheesy garlic breadsticks are a go-to recipe for many. They combine comfort, flavor, and ease of preparation into one delightful dish!
Preparation and Cooking Time
Making homemade cheesy garlic breadsticks is a quick process that requires about 30 minutes of preparation and 15-20 minutes of cooking time. Here is the breakdown:
– Preparation Time: 30 minutes
– Cooking Time: 15-20 minutes
– Total Time: Approximately 45-50 minutes
These times might vary slightly based on your kitchen equipment and familiarity with the recipe, but this guide should help you stay on track.
Ingredients
– 2 cups all-purpose flour
– 1 tablespoon active dry yeast
– 1 teaspoon sugar
– 3/4 teaspoon salt
– 3/4 cup warm water (about 110°F)
– 1 tablespoon olive oil
– 1/2 cup shredded mozzarella cheese
– 1/4 cup grated Parmesan cheese
– 3 tablespoons unsalted butter, melted
– 4 cloves garlic, minced
– 1 teaspoon dried parsley or Italian seasoning
– 1/2 teaspoon red pepper flakes (optional)
Step-by-Step Instructions
Creating these homemade cheesy garlic breadsticks is straightforward when you follow these easy steps:
1. Activate Yeast: In a small bowl, mix warm water, sugar, and yeast. Let it sit for about 5-10 minutes until bubbly.
2. Combine Dry Ingredients: In a large mixing bowl, whisk together flour and salt.
3. Mix Wet Ingredients: Add the activated yeast mixture and olive oil to the flour mixture.
4. Knead Dough: Stir until a dough forms. Knead on a floured surface for about 5 minutes, until smooth and elastic.
5. Let Dough Rise: Place the dough in a greased bowl, cover with a cloth, and let it rise in a warm place for about 30 minutes, or until it doubles in size.
6. Preheat Oven: Meanwhile, preheat your oven to 425°F (220°C).
7. Shape Breadsticks: Once risen, punch down the dough and roll it out into a rectangle about 1/2 inch thick. Cut into strips or your desired size.
8. Prepare Garlic Butter: In a small bowl, mix melted butter, minced garlic, and dried parsley or Italian seasoning.
9. Coat Breadsticks: Brush half of the garlic butter mixture over the dough strips, then sprinkle mozzarella and Parmesan cheese on top.
10. Bake: Place the breadsticks on a baking sheet covered with parchment paper. Bake in the preheated oven for 15-20 minutes, or until golden brown.
11. Finish with Butter: Once out of the oven, brush the remaining garlic butter mixture on top of the hot breadsticks. If using, add red pepper flakes for a little extra kick.
12. Serve Warm: Allow to cool slightly before serving.
Following these steps will have you pulling warm, cheesy garlic breadsticks from the oven in no time!
How to Serve
Serving homemade cheesy garlic breadsticks can enhance the overall dining experience. Here are some ideas on how to serve them:
1. Presentation: Place them on a rustic wooden board or in a basket lined with a cloth for a cozy touch.
2. Dipping Sauce: Offer marinara sauce, ranch dressing, or garlic butter for dipping to add an extra layer of flavor.
3. Pairs Well With: These breadsticks complement various dishes, including pasta, salads, or soups, making them versatile for meal options.
4. Serve Warm: Always serve breadsticks warm and fresh from the oven for the best experience. It’s hard to resist their aroma!
5. Garnish: Consider adding fresh herbs on top before serving for a pop of color and flavor.
By paying attention to presentation and accompaniments, you can make your serving of homemade cheesy garlic breadsticks truly special! Enjoy the delightful experience of tearing into these cheesy, garlicky wonders with friends and family.
Additional Tips
– Use Fresh Garlic: For the best flavor, always use fresh garlic instead of pre-minced or powdered garlic. Fresh garlic will give your breadsticks a more robust and aromatic taste.
– Experiment with Cheeses: While mozzarella and Parmesan are classic choices, feel free to try other cheeses like cheddar or gouda for a unique flavor profile.
– Partially Bake: If you want to prepare the dough ahead of time, you can partially bake the breadsticks, then freeze them. A quick reheat will give you freshly baked breadsticks in no time.
– Add Toppings: Consider sprinkling some extra cheese or herbs on top just a few minutes before they’re finished baking for an irresistible, cheesy crust.
Recipe Variation
There are many ways to customize your Homemade Cheesy Garlic Breadsticks! Here are some variations you might like:
1. Herb Infusion: Add finely chopped fresh herbs like basil, thyme, or rosemary into the dough for added flavor. This will give your breadsticks an aromatic twist.
2. Spicy Garlic Breadsticks: Incorporate jalapeños or other hot peppers into the dough or sprinkle crushed red pepper on top for an extra kick.
3. Cheesy Sticks: For an even cheesier version, use a blend of different cheeses such as a mix of mozzarella, cheddar, and asiago.
4. Garlic Parmesan Bites: Cut the dough into small squares and shape them into bite-sized pieces. Adjust baking time accordingly for quicker snacks.
Freezing and Storage
– Storage: Keep leftover breadsticks in an airtight container at room temperature for up to 2 days. If they are not consumed within this time, you can refrigerate them for longer freshness.
– Freezing: Wrap the cooled breadsticks in plastic wrap, followed by aluminum foil to prevent freezer burn. They can be frozen for up to 3 months. When ready to eat, simply reheat in the oven until warm.
Special Equipment
To create the perfect Homemade Cheesy Garlic Breadsticks, you’ll need some essential tools and equipment:
– Mixing Bowls: For combining ingredients and preparing the dough.
– Baking Sheet: A sturdy baking sheet is necessary for evenly baking your breadsticks.
– Parchment Paper: Line your baking sheet with parchment paper to prevent sticking and ensure easy removal.
– Rolling Pin: For rolling out the dough to the desired thickness.
Frequently Asked Questions
Why didn’t my breadsticks rise?
The yeast may have been expired, or the water was too hot or too cold. Make sure it’s around 110°F for the best activation.
Can these breadsticks be made gluten-free?
Yes, you can substitute all-purpose flour with a gluten-free flour blend, though the texture might differ slightly.
Can I use ready-made dough?
Absolutely! You can use store-bought pizza or bread dough if you’re short on time. Just roll it out and follow the rest of the instructions.
Can I make these breadsticks in advance?
Yes, you can prepare the dough in advance and keep it wrapped in the refrigerator for up to 24 hours before baking. Allow it to come to room temperature before rolling out.
Are these breadsticks suitable for freezing?
Yes! Follow the freezing guidelines above, and you’ll have delicious breadsticks ready whenever you want them.
Conclusion
Homemade Cheesy Garlic Breadsticks are an easy and delicious addition to any meal. Their savory flavors, cheesy goodness, and wonderful aroma make them a perfect treat for gatherings or a cozy family dinner. With this recipe, you’ll impress your friends and family while enjoying the satisfaction of homemade cooking. So preheat your oven and prepare to indulge in these delightful breadsticks!