No Bake Cheesecake Cups
Highlighted under: Indulgent Baking Ideas
I'm not much of a dessert person, but these No Bake Cheesecake Cups have changed my view. They cost around $10 to make and come together so quickly, which is perfect for last-minute gatherings. I first made them on a whim after some friends popped over, and honestly, they disappeared in minutes! Everyone loved the creamy filling, and my partner even asked if I could whip up another batch for the weekend. So now, I keep the ingredients on hand just in case.
Every time I make these, I'm surprised at how simple they are. It feels a little too easy, but the flavor is definitely there. I usually mix up the toppings based on what I have on hand, whether it’s fresh fruit or some crushed cookies. One time, I added a bit of lemon zest and it really brightened it up!
The key is actually letting them chill in the fridge for at least a couple of hours. I made the mistake of serving them too soon once, and the texture was just off. Lesson learned: Patience pays off when it comes to dessert!
The Best Part
- No baking is required at all
- You can use whatever toppings you like
- They’re super creamy and satisfying
What to Know Before Making No Bake Cheesecake Cups
These No Bake Cheesecake Cups are a delightful twist on traditional cheesecake and require no baking at all, which means less stress for you. If you’ve never made cheesecake before, don’t worry, it’s actually quite simple. Just remember that the cream cheese needs to be softened before you start mixing, or you’ll end up with lumpy filling. I often leave it out for an hour or so, or pop it in the microwave for 10 seconds if I forget.
The crust is another important part. I use store-bought graham cracker crumbs for convenience, but crushing your own should work just as well if you’re feeling ambitious. Just make sure the crumbs are fine so they stick together nicely when combined with the melted butter. Pressing it down firmly is key for a solid base; a glass or the back of a spoon helps with this.
Ingredients
Gather up these simple ingredients to make your cheesecake cups.
For the crust
- 1 cup crushed graham crackers
- 4 tablespoons unsalted butter, melted
- 2 tablespoons sugar
For the filling
- 8 oz cream cheese, softened
- 1/2 cup powdered sugar
- 1 teaspoon vanilla extract
- 1 cup heavy whipping cream
For the toppings
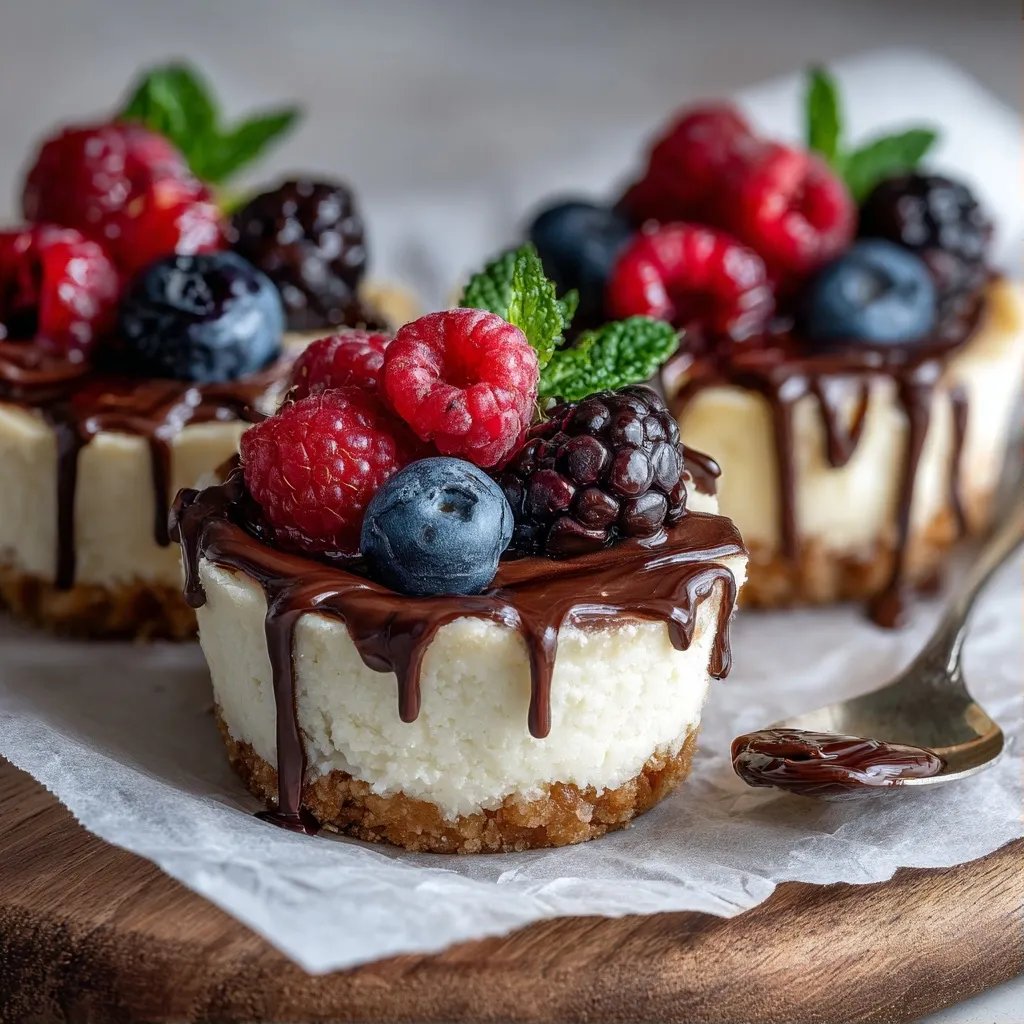
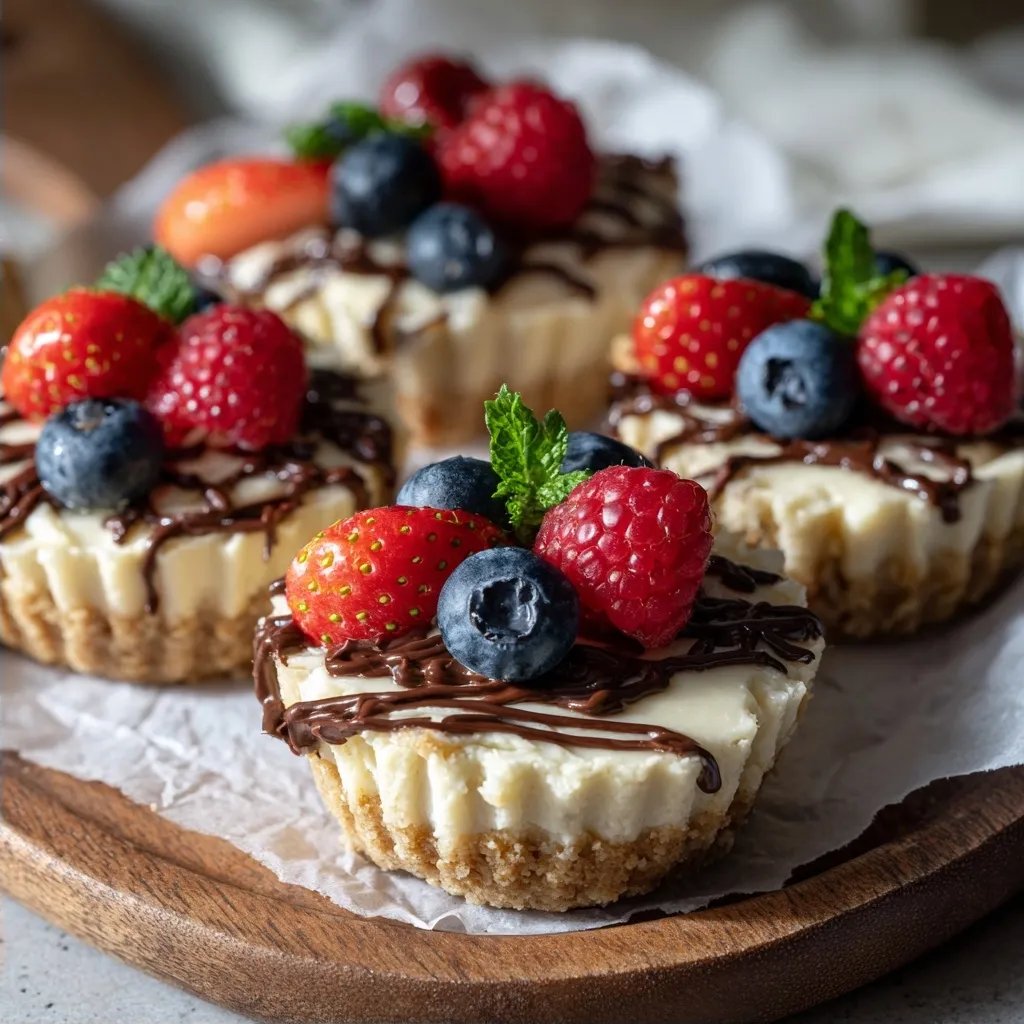
- Fresh berries, chocolate shavings, or caramel sauce
You can get creative with the toppings here!
Instructions
Let's get started on these cheesecake cups.
Make the crust
In a medium bowl, combine the crushed graham crackers, melted butter, and sugar. Mix everything until it resembles wet sand. Then, divide this mixture evenly between your serving cups, pressing down firmly to create a crust. Keep in mind, leaving a little space at the top will help with the filling later.
Prepare the filling
In a large mixing bowl, beat the softened cream cheese with an electric mixer until smooth. Gradually add in the powdered sugar and vanilla extract, mixing until everything is well combined. In another bowl, whip the heavy cream until it forms soft peaks. Carefully fold this whipped cream into the cream cheese mixture until no streaks remain. Be gentle here; you don't want to deflate that fluffiness!
Assemble the cups
Spoon the cheesecake filling over the crust in each cup, smoothing the tops with a spatula. Once they’re filled, cover each cup with plastic wrap and place them in the fridge for at least two hours. This part is crucial; it helps everything set up nicely.
Add your toppings
Before serving, go ahead and add your favorite toppings. Fresh berries work beautifully, or a drizzle of caramel adds a nice touch too. I usually make sure to save a few berries for decoration on top for a little flair. Besides, they make everything look a bit more fancy.
Enjoy your cheesecake cups!
Pro Tips
- If you want a stronger flavor, try adding a bit of lemon juice to the filling.
- Let them chill overnight if possible; the flavors get even better.
- You can swap the graham crackers for Oreos for a fun twist!
How to Store No Bake Cheesecake Cups
These cups will stay fresh in the fridge for up to three days if covered properly. Just make sure to use plastic wrap or an airtight container to keep them from absorbing any odors. If you’re not adding toppings right away, I recommend waiting until just before serving. This way, your berries stay fresh and vibrant, and the caramel doesn’t get too sticky.
Ways to Switch It Up
Feel free to get creative with the toppings. I sometimes use crushed Oreos or even sprinkle some crushed nuts on top for a little crunch. If you want a more decadent experience, a drizzle of chocolate ganache can be a delightful touch. You can also mix in flavors to the cheesecake filling, like a tablespoon of lemon juice for a hint of tartness or some melted chocolate for a richer filling. Honestly, there's a lot of room for experimentation here.
If you're catering to dietary restrictions, consider using gluten-free graham crackers or a nut-based crust for a different flavor base. Coconut cream can also substitute for heavy whipping cream if you're looking for a dairy-free alternative, though it may change the texture a bit.
Questions About Recipes
→ Can I use low-fat cream cheese?
You can, but I wouldn't recommend it too much. The texture can end up a bit different and may not be as creamy.
→ How long do these last in the fridge?
They should last about 3-4 days, but honestly, they’ll probably be gone before that!
→ What can I use instead of whipped cream?
You could try using a store-bought whipped topping, but beating the cream really makes a difference in the texture.
→ Can I freeze the cheesecake cups?
Yes! They freeze well, just make sure to wrap them up tight. Thaw in the fridge before serving.
→ Is it possible to make these dairy-free?
Absolutely! There are great dairy-free cream cheese and heavy cream options out there now.
No Bake Cheesecake Cups
Created by: The Meals By Sophia Team
Recipe Type: Indulgent Baking Ideas
Skill Level: Beginner
Final Quantity: 6.0
What You'll Need
For the crust
- 1 cup crushed graham crackers
- 4 tablespoons unsalted butter, melted
- 2 tablespoons sugar
For the filling
- 8 oz cream cheese, softened
- 1/2 cup powdered sugar
- 1 teaspoon vanilla extract
- 1 cup heavy whipping cream
For the toppings
- Fresh berries, chocolate shavings, or caramel sauce
How-To Steps
In a medium bowl, combine the crushed graham crackers, melted butter, and sugar. Mix everything until it resembles wet sand. Then, divide this mixture evenly between your serving cups, pressing down firmly to create a crust. Keep in mind, leaving a little space at the top will help with the filling later.
In a large mixing bowl, beat the softened cream cheese with an electric mixer until smooth. Gradually add in the powdered sugar and vanilla extract, mixing until everything is well combined. In another bowl, whip the heavy cream until it forms soft peaks. Carefully fold this whipped cream into the cream cheese mixture until no streaks remain. Be gentle here; you don't want to deflate that fluffiness!
Spoon the cheesecake filling over the crust in each cup, smoothing the tops with a spatula. Once they’re filled, cover each cup with plastic wrap and place them in the fridge for at least two hours. This part is crucial; it helps everything set up nicely.
Before serving, go ahead and add your favorite toppings. Fresh berries work beautifully, or a drizzle of caramel adds a nice touch too. I usually make sure to save a few berries for decoration on top for a little flair. Besides, they make everything look a bit more fancy.
Extra Tips
- If you want a stronger flavor, try adding a bit of lemon juice to the filling.
- Let them chill overnight if possible; the flavors get even better.
- You can swap the graham crackers for Oreos for a fun twist!
Nutritional Breakdown (Per Serving)
- Calories (kcal): 320
- Total Fat (g): 23.5
- Saturated Fat (g): 13.5
- Cholesterol (mg): 80
- Sodium (mg): 190
- Total Carbohydrates (g): 30
- Dietary Fiber (g): 1
- Sugars (g): 17
- Protein (g): 4