The Best Apple Crisp Recipe: An Incredible Ultimate Guide
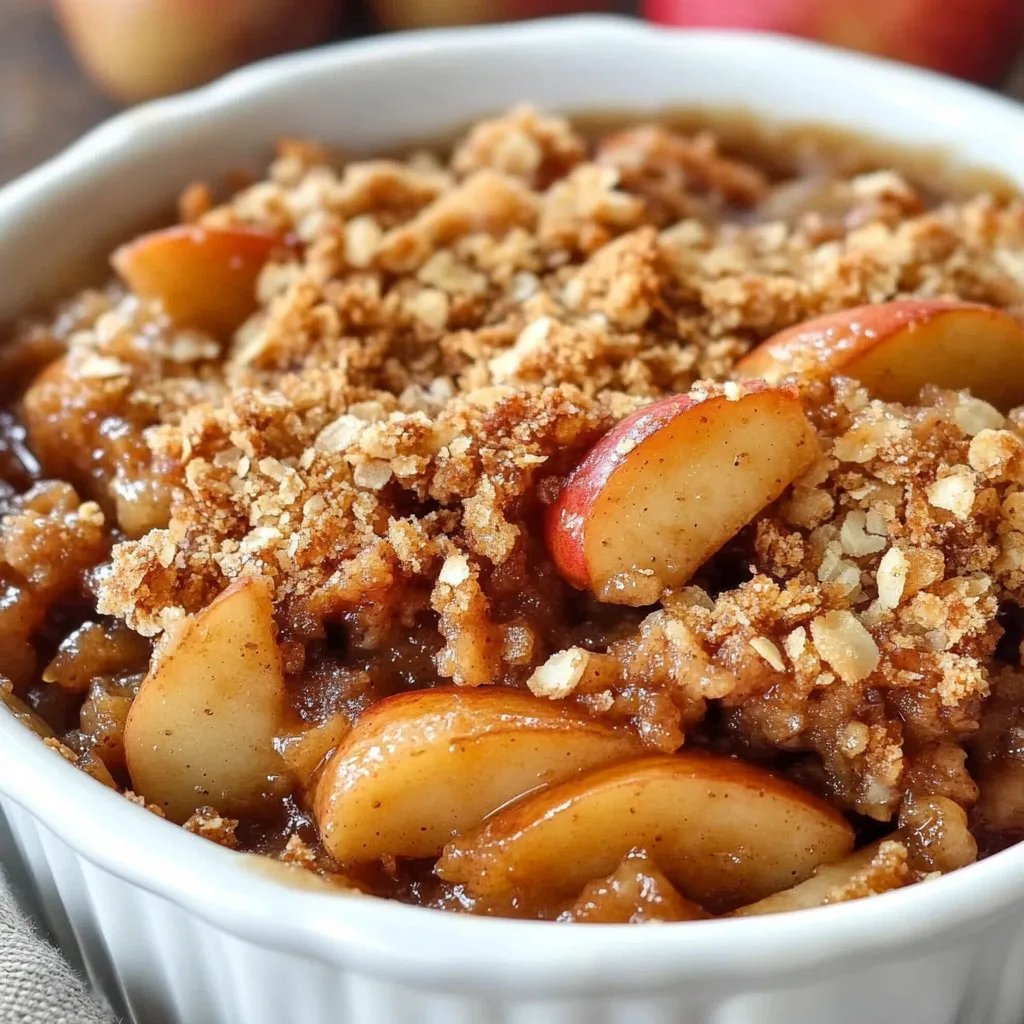
The Best Apple Crisp Recipe is an incredible dessert that combines tender baked apples with a crunchy, buttery topping. It’s a dish that brings warmth and comfort, perfect for any family gathering or cozy night in. The first bite reveals a delightful contrast between the juicy apples and the crispy oat topping, creating a symphony of flavors that will have everyone coming back for seconds. This dessert is not just about taste; it embodies the happiness of sharing moments with loved ones. So, let’s dive into what makes this recipe a must-try for every home cook.
Imagine a chilly autumn day where the scent of cinnamon fills your kitchen as the apple crisp bakes in the oven. The Best Apple Crisp Recipe captures that essence, transforming simple ingredients into an extraordinary dish. This recipe is designed to be beginner-friendly, meaning anyone can achieve delicious results. You’ll appreciate how easy it is to impress friends and family alike. Whether served warm with a scoop of vanilla ice cream or enjoyed on its own, this apple crisp is sure to create memories that last.
From its delightful aroma to its mouthwatering taste, The Best Apple Crisp Recipe is a dessert you’ll cherish. In this article, you’ll learn why this recipe stands out, how to prepare it, and tips for serving it perfectly. Get ready to embark on a kitchen adventure that will leave you and your guests absolutely satisfied!
Why You’ll Love This Recipe
The Best Apple Crisp Recipe is packed with flavors and textures that elevate any meal. Here are a few compelling reasons to fall in love with this exceptional dessert:
1. Simple Ingredients: Most components are pantry staples, making it convenient and cost-effective.
2. Quick Preparation: With minimal prep time, you can get this dessert in the oven quickly.
3. Customizable: This recipe is adaptable! You can experiment with different fruits or spices based on your preferences.
4. Irresistible Aroma: The smell of baking apples and cinnamon is sure to entice everyone in your home.
5. Versatile Serve Options: Enjoy it warm, cold, with ice cream, or even as breakfast!
6. Crowd-Pleaser: It’s a beloved dessert that is perfect for gatherings, holidays, or simply a cozy night in.
With these enticing aspects in mind, you will quickly understand why The Best Apple Crisp Recipe holds a special place in countless hearts and homes. Each spoonful delivers a burst of flavor that defines comfort food!
Preparation and Cooking Time
To create The Best Apple Crisp Recipe, you will need about 1 hour from start to finish. Here’s a breakdown of the time involved:
– Preparation Time: 15–20 minutes
– Cooking Time: 30–35 minutes
– Cooling Time: 5–10 minutes
These estimates give you a good idea of when you’ll be able to serve this delightful dessert. Smaller adjustments may be necessary based on your kitchen experience.
Ingredients
– 6 cups of sliced apples (about 6-8 medium)
– 1 tablespoon lemon juice
– 1 teaspoon ground cinnamon
– ½ teaspoon ground nutmeg
– ¾ cup granulated sugar
– 1 cup rolled oats
– 1 cup all-purpose flour
– ¾ cup packed brown sugar
– ½ cup cold unsalted butter, cubed
– A pinch of salt
Step-by-Step Instructions
Creating The Best Apple Crisp Recipe is straightforward. Follow these detailed steps for a delightful dessert:
1. Preheat the Oven: Preheat your oven to 350°F (175°C).
2. Prepare Apples: In a large bowl, toss sliced apples with lemon juice, cinnamon, nutmeg, and granulated sugar until well coated.
3. Arrange in Dish: Transfer the apple mixture into a greased 9×13-inch baking dish, spreading it out evenly.
4. Mix Topping: In another bowl, combine oats, flour, brown sugar, and salt.
5. Add Butter: Using a pastry cutter or your hands, mix in the cubed butter until you achieve a crumbly texture.
6. Top the Apples: Evenly distribute the oat mixture over the apples in the baking dish.
7. Bake: Place in the preheated oven and bake for 30–35 minutes until the top is golden and the apples are bubbling.
8. Cool: Remove from the oven and let it cool for 5–10 minutes before serving.
These steps will lead you to a delicious apple crisp that will impress anyone lucky enough to taste it.
How to Serve
Serving The Best Apple Crisp Recipe well can elevate the experience for you and your guests. Here are some tips:
1. Presentation: Transfer the crisp to a decorative serving dish, or leave it in the baking dish for a rustic look.
2. Ice Cream or Whipped Cream: Serve warm with a scoop of vanilla ice cream or a dollop of whipped cream for extra indulgence.
3. Garnish: Consider garnishing with a sprinkle of cinnamon on top or fresh mint leaves for a pop of color.
4. Slice Sizes: Serve generous portions that encourage guests to come back for more while keeping it manageable.
5. Beverage Pairing: Enhance the experience by pairing it with a cup of hot cider or your favorite coffee.
By keeping presentation and accompaniments in mind, you can ensure that The Best Apple Crisp Recipe becomes a memorable part of any gathering. Enjoy the deliciousness and the joyful moments it brings!
Additional Tips
– Use Fresh Apples: For the best taste, select crisp, fresh apples. Varieties such as Granny Smith or Honeycrisp provide a nice balance between sweet and tart flavors.
– Pre-Soak Your Apples: To prevent browning, soak sliced apples in a mixture of lemon juice and water for a few minutes before mixing with sugar and spices.
– Experiment with Spices: In addition to cinnamon and nutmeg, consider adding ginger, allspice, or cardamom for a unique twist.
– Mix Textures: For added crunch, try mixing in some chopped nuts like walnuts or pecans into the topping.
– Serve It Right: For an added touch, warm your plates slightly before serving to keep the apple crisp hot for longer.
Recipe Variation
Don’t be afraid to get creative! Here are some delightful variations to consider:
1. Mixed Fruit Crisp: Combine apples with other fruits such as pears, berries, or peaches for a fruity medley.
2. Tropical Twist: Add shredded coconut and chopped pineapple to the apple filling for a summery flavor.
3. Gluten-Free Option: Substitute all-purpose flour with a gluten-free flour blend for a gluten-free version.
4. Vegan Delight: Use plant-based butter and replace the sugar with coconut sugar or maple syrup for a vegan-friendly dessert.
5. Individual Servings: Create personal-sized crisps by using ramekins. This makes for charming individual servings!
Freezing and Storage
– Storage: Keep your apple crisp covered in the refrigerator. It can last for up to 3-4 days.
– Freezing: You can freeze apple crisp before baking. Wrap it tightly in plastic wrap and aluminum foil. It can be frozen for up to 3 months. Just bake from frozen, increasing the baking time slightly.
Special Equipment
Having the right tools can make your apple crisp making experience even smoother. Here’s what you’ll need:
– Sharp knife and cutting board for slicing the apples.
– Mixing bowls for combining ingredients.
– A greased 9×13-inch baking dish for the final bake.
– Pastry cutter or fork for mixing the topping.
– Measuring cups and spoons for accurate ingredient measurements.
Frequently Asked Questions
Can I use frozen apples for this recipe?
Yes, you can use frozen apples. However, reduce the sugar since frozen fruit tends to release more moisture.
What if I don’t have rolled oats?
You can substitute quick oats or even use crushed granola for a different texture in the topping.
Can this recipe be made in advance?
Yes, you can prepare the apple mixture and topping separately in advance and refrigerate them. Assemble and bake them just before serving.
How do I know when the apple crisp is done?
Your apple crisp is done when the topping is golden brown and the apples are bubbling. You can pierce the apples with a fork; they should be tender but not mushy.
Is there a low-sugar variation?
Yes! You can substitute granulated sugar with a sugar alternative or reduce the total sugar used in the recipe.
Conclusion
The Best Apple Crisp Recipe is a must-try dessert that brings joy and warmth to any occasion. Its combination of tender apples and a crispy, crumbly topping creates a delightful experience for dessert lovers. Whether shared with friends or savored during a quiet evening at home, this recipe is sure to impress. By adding your unique twists and following the tips provided, you can create a version that’s perfectly tailored to your tastes. Enjoy every spoonful and the wonderful memories it generates!