No Bake Coconut Tart
Highlighted under: Indulgent Baking Ideas
I'm not the best at making desserts, so the fact that this coconut tart turned out so well was a nice surprise. It's quick to throw together, and you don't even need to turn on the oven, which is a win during hot days. I made it for a picnic, and my friends couldn't get enough of it. Seriously, they were asking for the recipe before we even left the park.
When I first saw a recipe for a no bake coconut tart online, I was a bit skeptical. I mean, how could something so simple taste so good? But after giving it a shot, I found out it’s not just easy, it’s also incredibly satisfying. The blend of coconut and cream cheese is like a little piece of paradise.
As I was making it, I got a little too excited and may have licked the mixing bowl clean. Honestly, I might need to double it next time, because it disappears faster than I can slice it! My partner couldn’t believe it wasn’t baked, and that made my day.
Why I Keep Making This
- It comes together in just 15 minutes
- You really don’t need any fancy kitchen tools
- The coconut gives it that tropical vibe
Choosing Your Ingredients
For this tart, stick with unsweetened shredded coconut if you can. Sweetened coconut has its place, but it can easily make the tart too sweet, and nobody wants an overly sugary dessert. When it comes to the cream cheese, use a full-fat version for the best flavor and creaminess. Low-fat options just don't quite cut it here.
I usually buy a block of cream cheese and leave it out at room temperature for about an hour before I start. This way, it gets super soft and easier to mix. Also, if you can't find coconut cream at your store, you can often find it in the Asian section of larger supermarkets. It's a bit richer than coconut milk, which is what we want here.
A Quick Note on No Bake Coconut Tart
I find this no-bake tart to be such a breeze and perfect for those hot summer days when you don't want to turn on the oven. Honestly, the longer it chills, the better it seems to get. It's hard to resist taking a bite too soon, but waiting gives the filling time to really set up and makes slicing a lot easier.
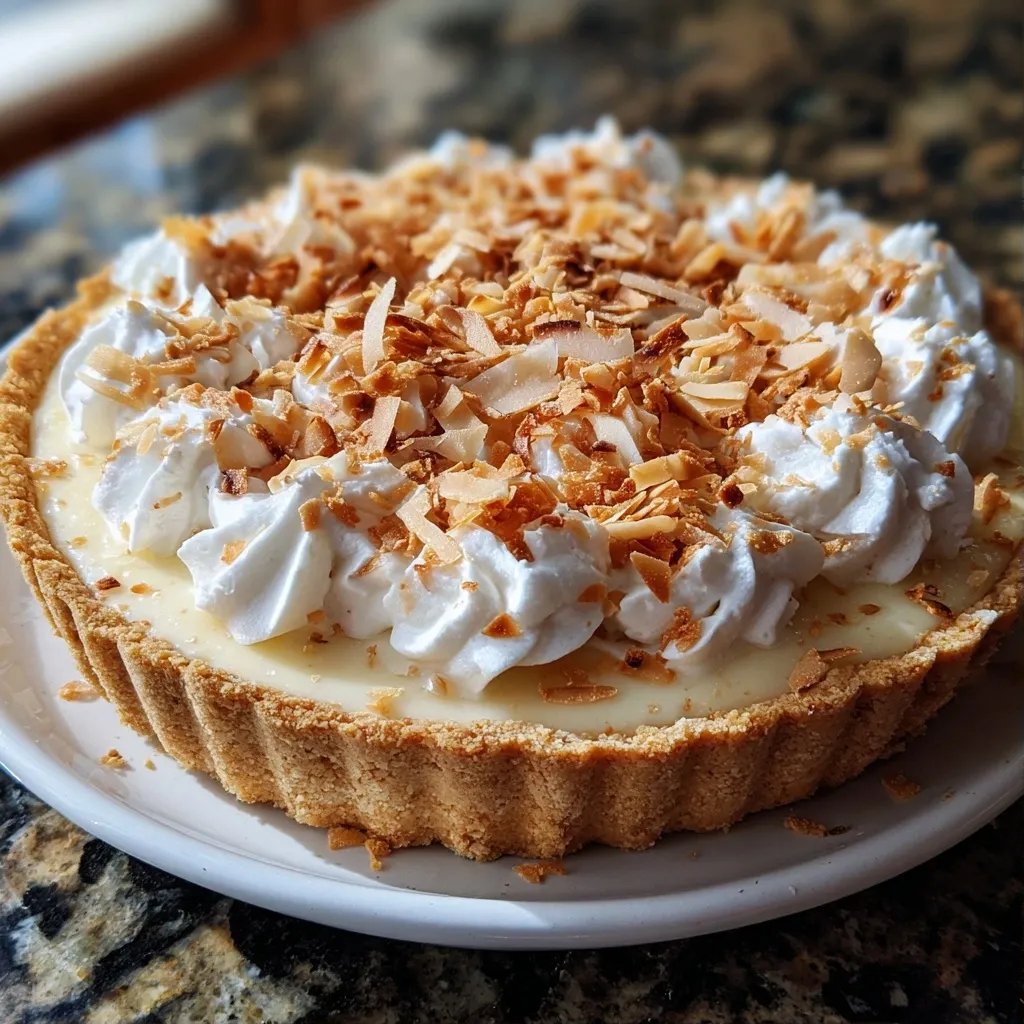
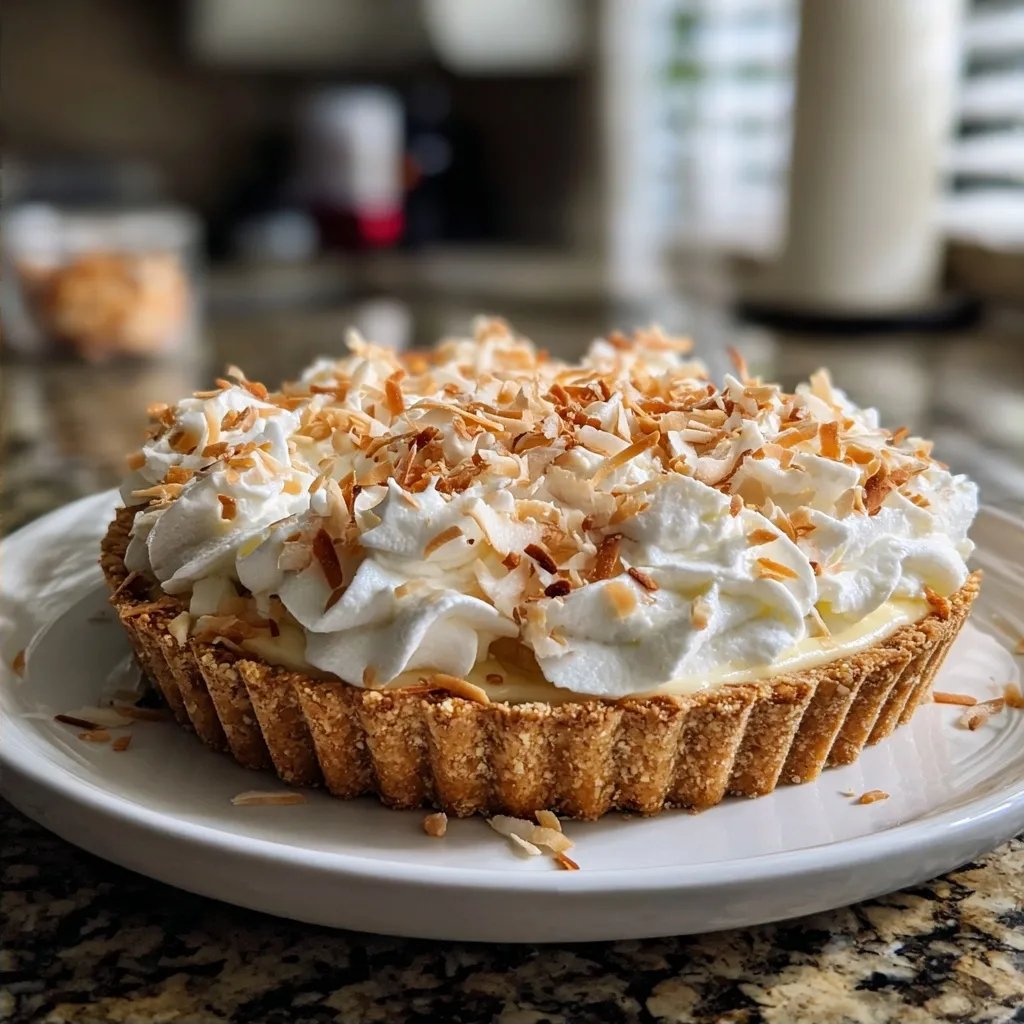
When it comes to the toppings, I like to toast the coconut flakes in a dry skillet over medium heat. Just a few minutes, stirring often, and they’ll turn a lovely golden brown. You can skip this step, but the toasted nuts add a nice touch. If you've got extra whipped cream, feel free to be generous with it – or even just spoon some on top of each slice as you serve!
Ingredients
Ingredients
For the Crust
- 1 ½ cups graham cracker crumbs
- ½ cup unsweetened shredded coconut
- ½ cup melted Kerrygold butter
- 2 tablespoons sugar
For the Filling
- 1 cup cream cheese, softened
- 1 cup coconut cream
- ¼ cup powdered sugar
- 1 teaspoon vanilla extract
- ¼ teaspoon salt
For Topping
- 1 cup whipped cream
- ¼ cup toasted coconut flakes
Instructions
Instructions
Instructions
Make the Crust
In a mixing bowl, combine the graham cracker crumbs, shredded coconut, melted Kerrygold butter, and sugar. Mix it all up until it's well combined. You want it to hold together when pressed, so if it feels too dry, add a little more butter. Once it's good, press the mixture firmly into the bottom of a 9-inch tart pan and pop it in the fridge while you prepare the filling.
Prepare the Filling
In a separate bowl, beat the softened cream cheese until smooth. Then add the coconut cream, powdered sugar, vanilla extract, and salt. Mix until everything is nice and creamy, with no lumps. I usually use my hand mixer to get it really smooth, but you can use a whisk if that's what you have. Just check for lumps, because no one wants that in their tart!
Assemble the Tart
Take the crust out of the fridge, then pour the filling over it, spreading it out evenly. Don’t worry if it doesn't look perfect, it will set up nicely in the fridge. Cover it with plastic wrap and chill for at least 45 minutes, or until it’s firm enough to slice.
Add the Toppings
Once the tart is set, spread the whipped cream on top and sprinkle with the toasted coconut flakes. I love piling it on, but you can adjust the amount based on your preference. It’s ready to serve, but if you can wait, letting it chill a bit longer makes it even better.
Enjoy!
How to Store No Bake Coconut Tart
Once you’ve assembled the tart, cover it tightly with plastic wrap and keep it in the fridge. It should hold up nicely for about 3-4 days, though I doubt it will last that long in many homes. If you can, slice it just before serving for the freshest texture. The crust might get a little softer the longer it sits, but it still tastes great.
Ways to Switch It Up
Feeling adventurous? You could swap out the shredded coconut in the crust for crushed nuts like almonds or walnuts for a different flavor base. If you want a chocolate spin, add some cocoa powder to the filling. Just remember to reduce the powdered sugar a bit so it doesn’t get too sweet.
You can also play around with the toppings. A drizzle of chocolate or even fresh fruit like sliced strawberries would complement the coconut beautifully. I sometimes mix in a little lime zest with the filling for a fresh twist that brightens it up. The possibilities are pretty much endless!
No Bake Coconut Tart
Created by: The Meals By Sophia Team
Recipe Type: Indulgent Baking Ideas
Skill Level: Easy
Final Quantity: 8.0
What You'll Need
For the Crust
- 1 ½ cups graham cracker crumbs
- ½ cup unsweetened shredded coconut
- ½ cup melted Kerrygold butter
- 2 tablespoons sugar
For the Filling
- 1 cup cream cheese, softened
- 1 cup coconut cream
- ¼ cup powdered sugar
- 1 teaspoon vanilla extract
- ¼ teaspoon salt
For Topping
- 1 cup whipped cream
- ¼ cup toasted coconut flakes
How-To Steps
In a mixing bowl, combine the graham cracker crumbs, shredded coconut, melted Kerrygold butter, and sugar. Mix it all up until it's well combined. You want it to hold together when pressed, so if it feels too dry, add a little more butter. Once it's good, press the mixture firmly into the bottom of a 9-inch tart pan and pop it in the fridge while you prepare the filling.
In a separate bowl, beat the softened cream cheese until smooth. Then add the coconut cream, powdered sugar, vanilla extract, and salt. Mix until everything is nice and creamy, with no lumps. I usually use my hand mixer to get it really smooth, but you can use a whisk if that's what you have. Just check for lumps, because no one wants that in their tart!
Take the crust out of the fridge, then pour the filling over it, spreading it out evenly. Don’t worry if it doesn't look perfect, it will set up nicely in the fridge. Cover it with plastic wrap and chill for at least 45 minutes, or until it’s firm enough to slice.
Once the tart is set, spread the whipped cream on top and sprinkle with the toasted coconut flakes. I love piling it on, but you can adjust the amount based on your preference. It’s ready to serve, but if you can wait, letting it chill a bit longer makes it even better.
Nutritional Breakdown (Per Serving)
- Calories (kcal): 290
- Total Fat (g): 22.7
- Saturated Fat (g): 12.5
- Cholesterol (mg): 60
- Sodium (mg): 185
- Total Carbohydrates (g): 25
- Dietary Fiber (g): 2.7
- Sugars (g): 9.5
- Protein (g): 3.6